
How to make a normal page view in a Word. All ways: How to make a landscape page in Word
- Step 1 Insert page numbers
- Step 2 Remove the number from the first page
- Creating landscape orientation in Word 2003
- Change orientation in Word 2007 document
- Landscape view in the Word 2010 and 2013
- How to make a landscape only one page
Text Word editor - the most common program in the package Microsoft Office to create and edit text documents , and also for construction of the elementary tables and algorithms. Often when working with Word, you have to print and process a significant number of pages. To avoid confusion and confusion in the order of sheets, great idea There will be a numbering in the document. And if suddenly the paper is mixed, it will allow you to easily restore the order and decompose all the right order. It should be noted that not everyone who deals with this program knows how to put down the numbering, although there is nothing difficult here.
At the top is a toolbar. On the left there is the "Insert" item, where you need to click with the mouse. In the submenu, select "Page Numbers." After this action another window will pop up. With the “OK” key you confirm the selected action and numbering will automatically appear on all pages. This applies to those pages that you have already created, as well as those that you plan to create later.
After that, you can change the default settings. Item "Position" determines the location of page numbering, at the top or bottom of the sheet. The item "Alignment" puts the numbering position in the center of the page, to the left or to the right.
In order not to deprive your document of aesthetic appearance, you should uncheck the box next to the "Number on the first page" option then on all sheets, except for the title, numbering will be present.
Again, on the toolbar closer to the center there is the "Format" option, clicking on which you can choose in what format you want to see the numbers on the pages of the document. It can be Arabic and Roman numerals. In this submenu, you can also select page numbers to which numbers should be placed in the document.
On the numbered pages it is possible to change the size and style of numbers. To do this, just click the mouse 2 times on the number. After that, you need to select the number and select the font and style. Click "Close" and the changes will take effect on all pages, both on already created ones and on those you are going to create.
In the event that you change your mind and decide to delete the page numbering, you should also click 2 times on the number on the page and press the "Delete" button on the keyboard and then "Close" to delete the page numbers.
Step 1 Insert page numbers
Choose in the menu "Insert" -> "Page numbers" the desired number location.
After that, all the pages of the document will be numbered.
Step 2 Remove the number from the first page
Sometimes it happens that you need to configure different footers for different pages.
For example, you need to remove the number from the first page or from the first two, starting the numbering from the third.
If only with the main one, then you need to tick the "Special page footer for the first page" in the "Designer" menu, in the footer editing mode.
Often, when working with documents in MS Word, it is necessary to transfer those or data within one document. Especially often this need arises when you create a large document yourself or insert text from other sources into it, while structuring the available information.
It also happens that you just need to swap pages while retaining the original text formatting and the layout of all other pages in the document. We will describe how to do this below.
The simplest solution in a situation when it is necessary to change sheets in Word in the Word is to cut out the first sheet (page) and insert it immediately after the second sheet, which then becomes the first.
1. Using the mouse, select the content of the first of two pages that you want to swap.
2. Press “Ctrl + X” (the “Cut” command).
3. Place the cursor on the line immediately following the second page (which should be the first).
4. Press “Ctrl + V” ( “Paste” ).
5. Thus the pages will be swapped. If an extra line appears between them, position the cursor on it and press the “Delete” or “BackSpace” key.
By the way, in the same way, you can not only swap pages, but also move text from one place to another document, or even insert it into another document or another program.
- Tip: If the text that you want to paste in another place of the document or in another program should remain in its place, instead of the “Cut” command ( “Ctrl + X” ), use the “Copy” command ( “Ctrl + C” ) after selecting it . ).
That's it, now you know even more about Word features . Directly from this article, you learned how to swap pages in a document. We wish you success in the further development of this advanced program from Microsoft.
To professionally execute a document, you need not only to understand how to customize the appearance of the text, but also to know how to do it in Word. album page .
With the help of Word from the Microsoft Office suite, you can decorate any type of document by applying various styles and formatting objects to it. Thanks to the word processor, you can significantly save time on editing large files and texts.
Creating landscape orientation in Word 2003
In the old version of the Word, the process of changing some of the page parameters is significantly different from the new editions. That is why you should consider how to change the position of the page in this case.
Follow the instructions to change the landscape orientation:
- In the new document, open any page and select the menu item called “File” on the toolbar. Then open the drop-down list box to change the parameters;
- In this window, you can manually adjust the size of the margins, determine the size of the paper used. To change the position, find the corresponding field and select the landscape one, as shown in the figure above.
Remember! In the old version of the Word after changing the orientation of the page from the book to the landscape one, it is necessary to change the fields as well, because the text will move and go beyond the edges of the sheet.
Change orientation in Word 2007 document
This version word processor Ward is the first to receive an updated user interface.
Now the program menu items on the toolbar are divided into logical blocks: for formatting appearance text, markup conversion, work with tables, pictures and other tabs.
To change the orientation in this version of the Word, follow these instructions:
- Open the desired Word file and find the page markup tab on the toolbar;
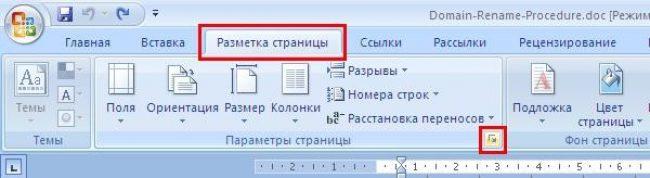
- Select an orientation item. A drop-down list will appear. Select the desired type. After committing this action all pages will be landscape;
You may also find it helpful to read these articles:
- Creating and Inserting Formulas in Word - Walkthrough
Landscape view in the Word 2010 and 2013
Since all newer versions of Word have a similar interface, the orientation change is the same. For greater clarity, we give an example of replacing the position of the page in the new versions of the Word.
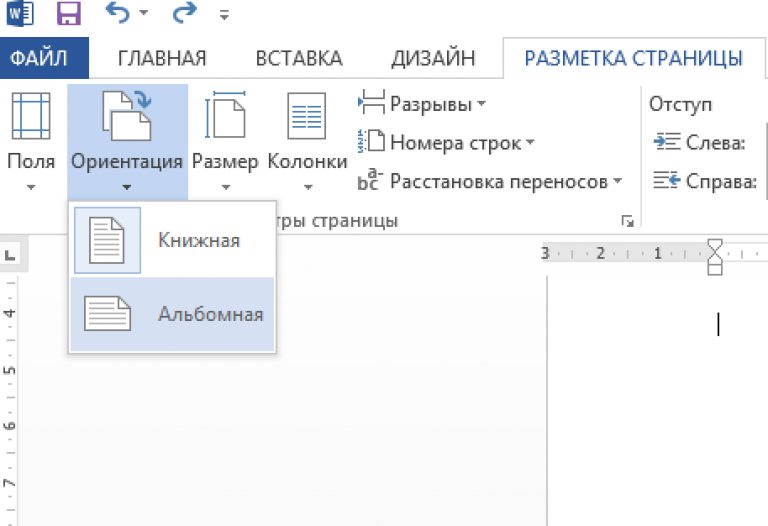
- Open the tab for layout;
- In the drop-down menu of the orientation field, select landscape.
How to make a landscape only one page
In Word, it is also possible to alter the orientation of only one page of the document, for example, the second:
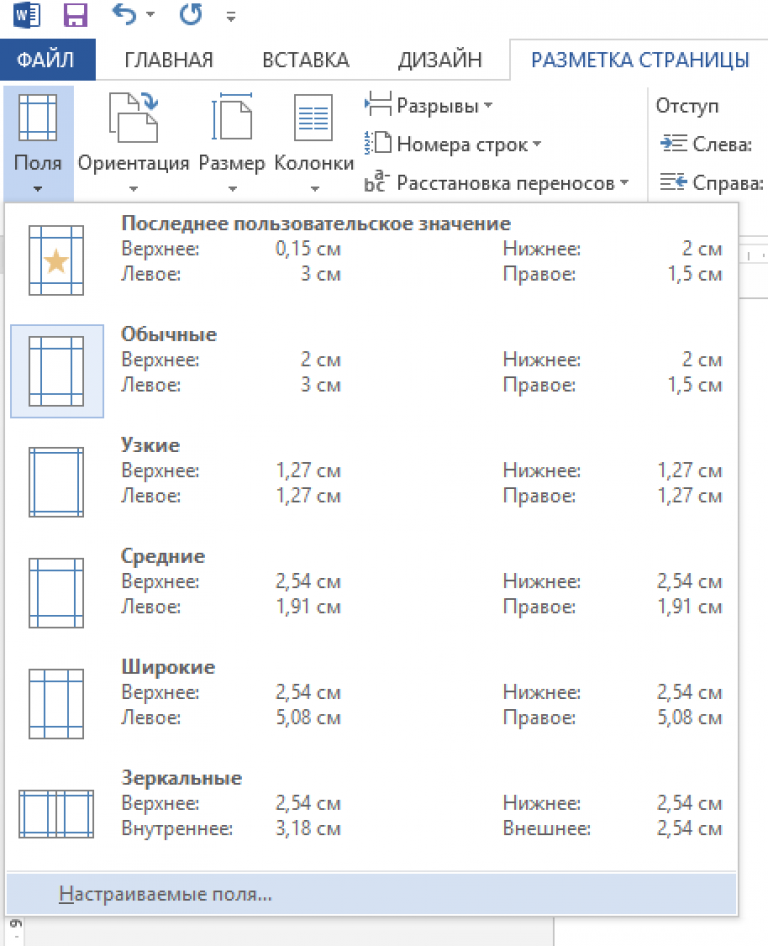
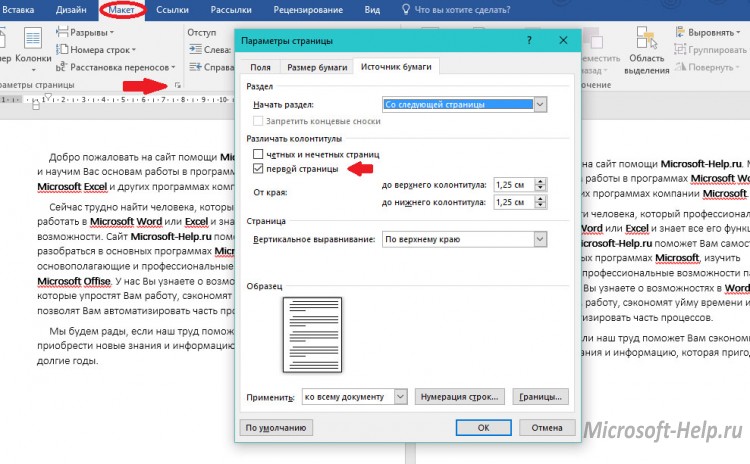
- Open the page layout tab;
- Click on the "fields" and in the window that appears, select custom fields. A separate window will open;
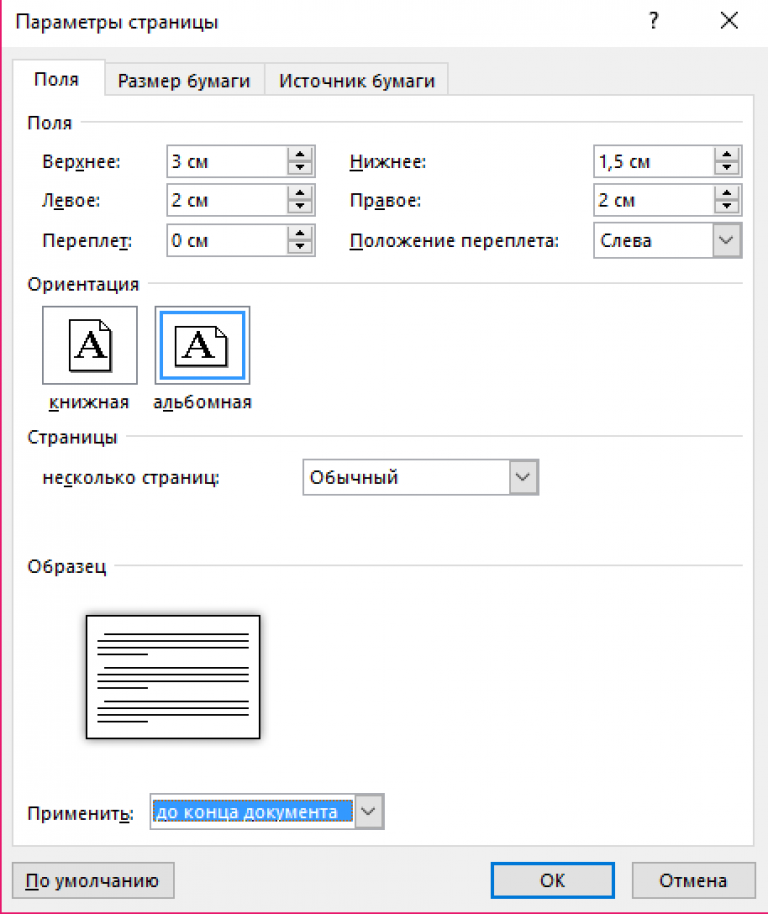
- In the window that appears, select landscape orientation ;
- In the "apply" field, select the application until the end of the entire document. Thus, you can make several pages of landscape. To make a few more pages with a book view, select the necessary sheets and perform the steps that are listed in paragraphs 1-3.
Setting the orientation for a single sheet
Numbered pages are a sign good tone and just the need for complex documents. Therefore, it is obvious that it is the main Microsoft Word and contains many settings. In order to put down the pages you need to go to the " Insert " tab, in the " Footers " section, which is in the right part, click on "Page Number ", choose where you want to see them, having decided on the appearance. After that, they will automatically appear on all pages.
Standard types of page numbers consist of the following groups:
- Simple - puts the number in the right place;
- Simple number - contains additionally various simple elements or modifies numbers;
- With figures - adds geometric shape , for a brighter emphasis on page numbers;
- Page X - adds the word "Page" or any other, depending on the program language, to the number;
- Page X of Y - indicates the number of the current page and the total number.
By the way, the amount different types display the number of the current page when displayed at the bottom is much larger than for the upper part.
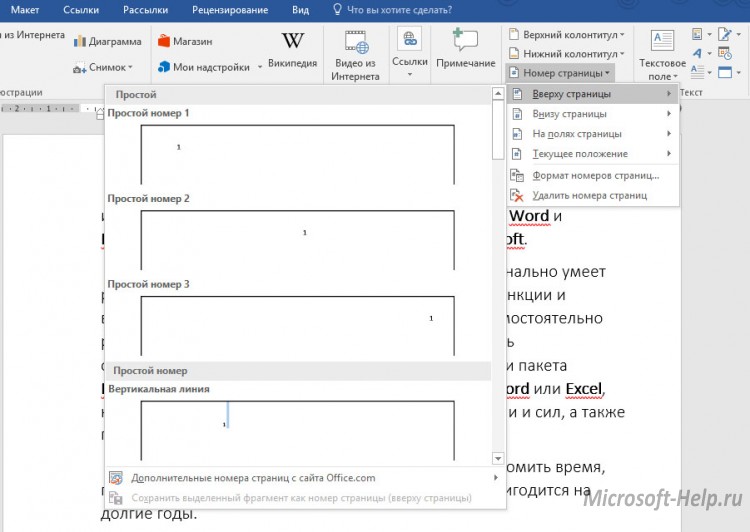
If you want to see the number on the side - in the margin of the page, then there are even fewer settings. This may be a simple number, with a figure or with the word "Page".
By clicking on the current position, you will be available to the whole range of options for the appearance of the pages, as well as for the top and bottom, but only the number will appear directly in the place where the cursor is now located.
At the bottom of the same list “Page Number ” there is an item “ Page Number Format ”. There you can choose the number format:
- Roman numerals;
- Standard Arabic;
- Latin letters, etc.
By clicking on the “ Include chapter number ” you can get additional numbering not only for the pages, but also for the chapters (sections) of the document, if any.
Finally, selecting Continue will be numbered from first to last, and Start from will allow you to select the number from which the numbering of the entire document will begin.
A simple button “ Delete page numbers ” will perform the corresponding function.
If you add page numbers, the header designer will open. There you can change the field settings, which will affect the location of the numbers.
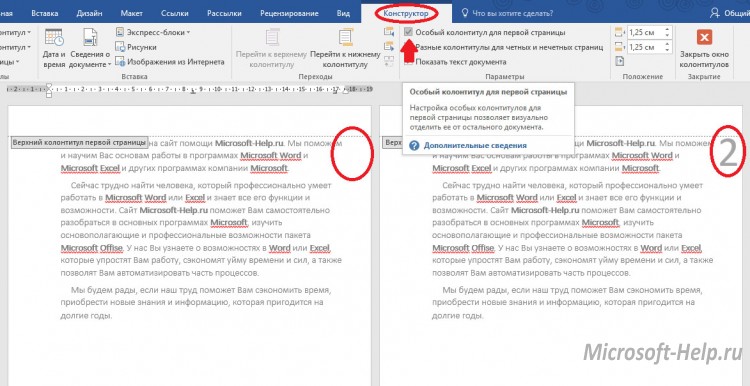
In the opened construct, click on " Special footer for the first page ”, you can leave the first page of your document without a number, and the rest will be numbered starting from number 2. The same can be done on the“ Layout ”tab by clicking on the small icon to the right of the page settings section. Then in the section “ Distribute headers and footers ” choose “ first page ”.
This instruction is relevant for Word, starting with version 2007.
For Word 2003, go to " Insert " -> "Page numbers ", select " Position " and " Alignment ", if necessary, set the settings in the " Format ". Click " OK " and you're done.